
Changing the “Older” and “Newer” pagination labels in the Divi Blog module lets you present clearer, more on-brand navigation for readers as they browse through posts. This is especially useful when the default wording doesn’t match your site’s tone or when you want more descriptive calls to action that improve usability. In this guide we show you how to set custom pagination link text using the Divi Booster plugin.

Customize Divi Blog Module Pagination Link Text using Divi Booster
Divi Booster includes a Newer / Older Entries Text Feature which adds custom pagination label fields to the Divi Blog module and applies those values on the front end. It’s a straightforward, no-code approach to replacing Divi’s default “Older” and “Newer” pagination link text with your own wording.
Set the "Older Entries Text" Pagination Label
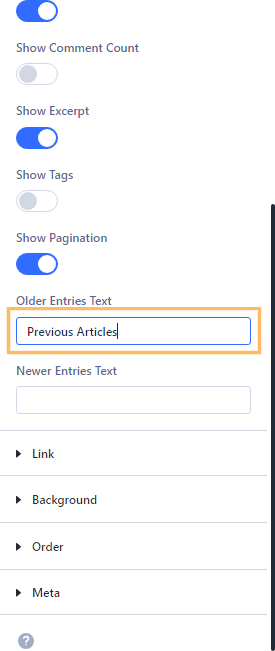
Within the Blog module settings, go to the Content tab and open the Elements section. Here, find the field labeled "Older Entries Text" and enter your preferred label, such as "Previous Articles". This text will appear as the left pagination link.
Set the "Newer Entries Text" Pagination Label
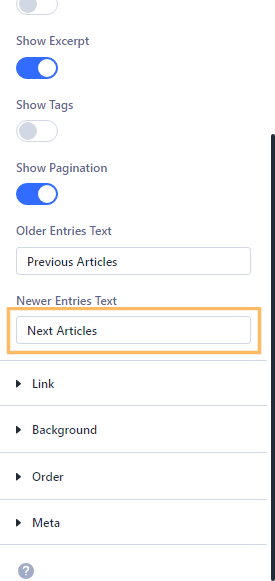
In the same section where you set the older entries text, find the "Newer Entries Text" field. Enter your desired label here, such as "Next Articles". This will appear as the right pagination link when applicable.
Check the Blog Module on the Front End to Confirm Custom Labels
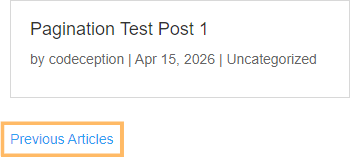
After you have set your pagination labels, make sure to save and publish your page to ensure your custom settings are live on your site. Visit your page on the front end to see your changes in action. The Blog module's pagination should now display your custom text labels, such as "Previous Articles" and "Next Articles", under the post list.
Conclusion
With just a few quick changes in the Divi Builder, you can tailor the Blog module's pagination text to better fit your site's branding and help readers navigate your content more intuitively.

0 Comments