A timeline is easier to follow when visitors can quickly see where they are in the sequence. By styling previous, current and upcoming items differently, you can make your Divi Timeline feel more guided, polished and interactive.
This is useful for process steps, company histories, project phases, roadmaps, event schedules and any layout where the timeline should show a clear sense of progress.

How to Style Divi Timeline Items by Scroll State using Divi Booster
Divi doesn’t include built-in settings for styling timeline items based on their scroll position. But now Divi Booster adds these controls to the Timeline module, letting you style previous, current and upcoming items directly in the builder.
Install Divi Booster
To use Scroll State styling, first install and activate Divi Booster.
Once active, Divi Booster adds extra Timeline module settings in the Divi Builder, including the Scroll State design options used in this guide.
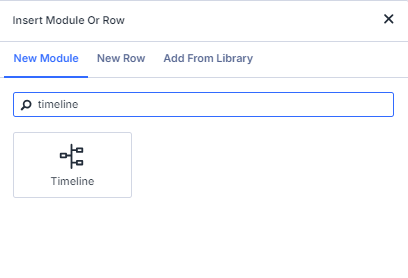
Add a Divi Timeline Module
Open the Divi Builder and add a Timeline module to your page.
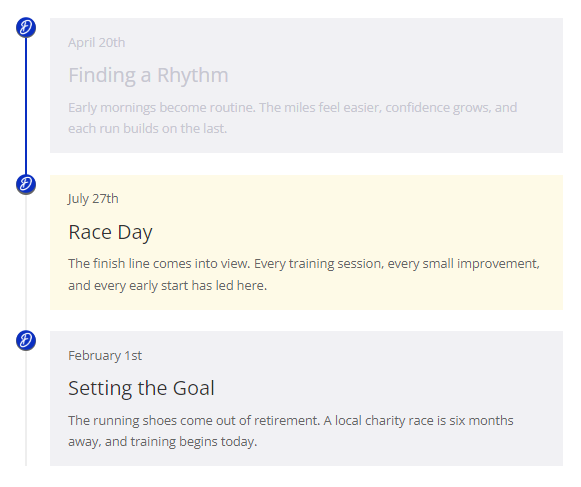
Add your Timeline Items as usual, then make sure you’re using the standard vertical Timeline layout. The Scroll State styling works naturally with vertical timelines as visitors scroll down the page.
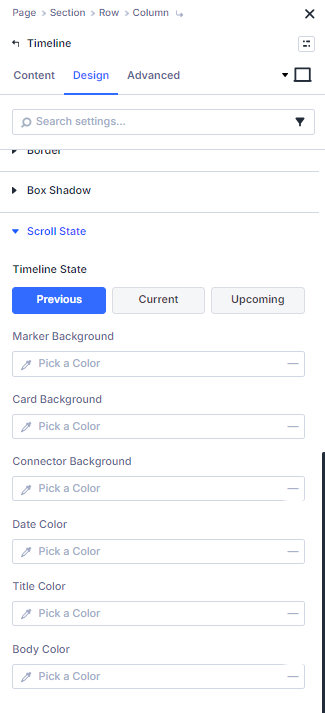
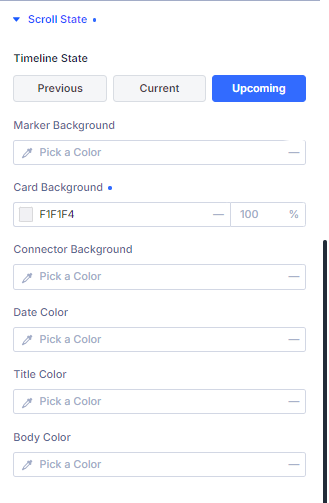
Open the Scroll State Settings
Open the Timeline module settings and go to:
Timeline → Design → Scroll State
Here you’ll see controls for styling the Timeline Items in three states:
- Previous
- Current
- Upcoming
You can switch between these using the Timeline State buttons.
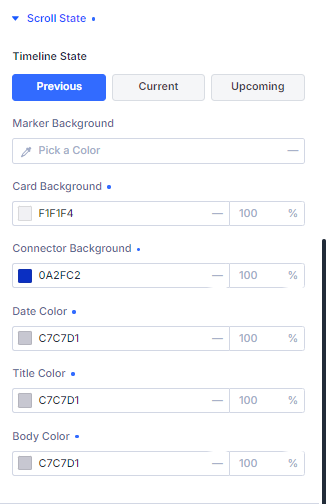
Set the Previous State
Select Previous.
These styles apply to Timeline Items that the visitor has already passed.
For example, you might set previous items to use softer or muted colors, such as:
- a subtle marker color
- a lighter card background
- quieter date, title and body text colors
This helps completed items remain visible without competing with the current item.
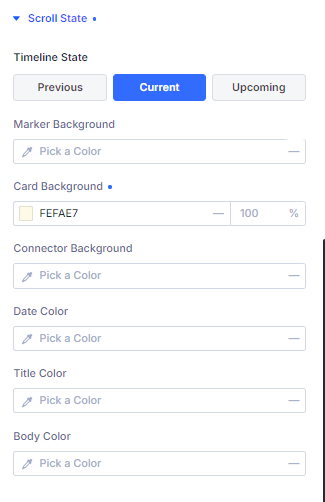
Set the Current State
Select Current.
These styles apply to the Timeline Item currently in focus.
This is usually the state you’ll want to emphasize most. For example, you might use:
- a stronger marker color
- a highlighted card background
- bolder title or date colors
The current state helps guide the visitor’s eye to the most relevant part of the timeline.
Set the Upcoming State
Select Upcoming.
These styles apply to Timeline Items that are still further down the page.
You might make upcoming items slightly lighter or more neutral, while keeping them readable. This gives the timeline a clear sense of what has happened, what is happening now and what is coming next.
Save and View the Timeline
Save the Timeline module, then save the page.
View the page on the front end and scroll through the timeline. As each item moves through the viewport, Divi Booster will update its scroll state styling automatically.
If the colors don’t update straight away, clear any Divi, plugin, server or CDN caches and reload the page.
Customize Your Timeline Further
Once your scroll state styles are set, you can keep refining the Timeline module.
For example, you can add custom icons to your Timeline Items using this guide:
How to Add Custom Icons to the Divi Timeline Module
Or, if you want a more interactive horizontal layout, you can turn the Timeline module into a carousel:
How to Turn the Divi Timeline Module into a Horizontal Carousel
Scroll State styling also works with Divi Booster’s horizontal carousel timeline layout, where the current carousel item is styled as the current state. It doesn’t apply to Divi’s standard horizontal timeline layout unless the carousel is enabled, as that layout doesn’t have the same scroll-based progression.
Conclusion
Scroll State styling is a simple way to make Divi timelines clearer and more engaging. With Divi Booster, you can style previous, current and upcoming Timeline Items directly from the Timeline module settings, without custom CSS.
Is there anything else you’d like to be able to do with the Divi Timeline module? Let me know in the comments.

0 Comments