The built-in Divi Tooltip module makes it easy to add text tooltips to your Divi Builder layouts. Adding an icon to your tooltips is a great way to improve their design, make them more scannable or add some custom branding. In this guide we'll look at how to add an icon to the tooltip module, using the built-in Divi Icon module.

Add an Icon to the Divi Tooltip Module using the Icon Module
The flexibility of Divi 5's nested modules and flexbox features can be used here to easily add an icon into the Divi Tooltip Module tooltip content, without custom code or plugins. To achieve this, we'll add an icon module into an existing tooltip, and then position it with flexbox.
Open your Tooltip Layout in the Divi Builder
Begin by opening the layout with your tooltip in the Divi Builder.
If you haven't yet set up a tooltip, see our guide on how to add a tooltip in Divi. Here's the example tooltip we set up in that guide, and which we'll use as the starting point for adding an icon.

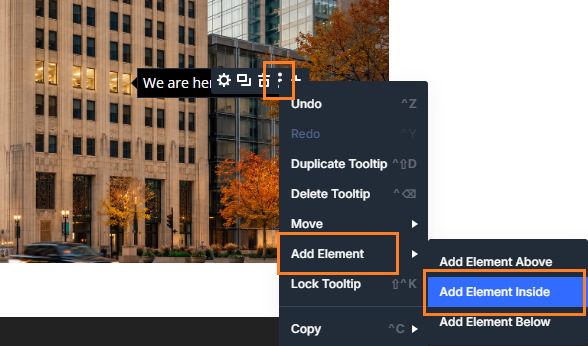
Select to Add Element Inside the Parent
Now, we'll embed our icon into the tooltip module. To begin, right click on the "three dot" menu in the tooltip action buttons, and navigate to "Add Element" then select the "Add Element Inside" option.
Insert an Icon Module
Now the "Insert Module or Row" modal menu should appear. Scroll to, or search for, the "Icon" module. Click it to add it to the tooltip.

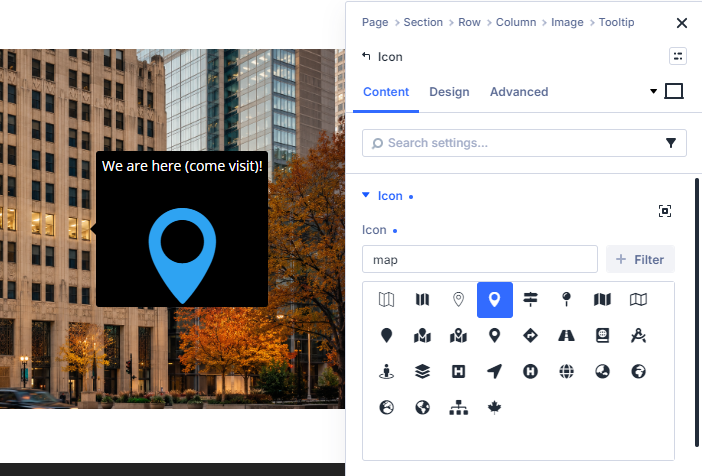
Choose your Icon
In the icon module settings, you can now select the icon you'd like to display in the tooltip, at:
Icon > Content > Icon > Icon
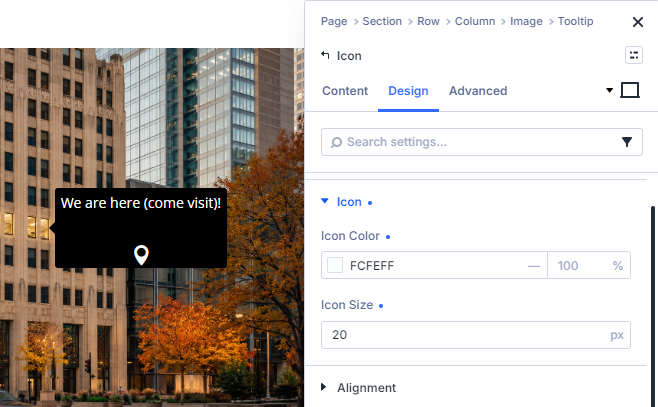
Style the Icon
If you wish to do so, you can change the color and size of the icon, at:
Icon > Design > Icon > Icon Color
Icon > Design > Icon > Icon Size
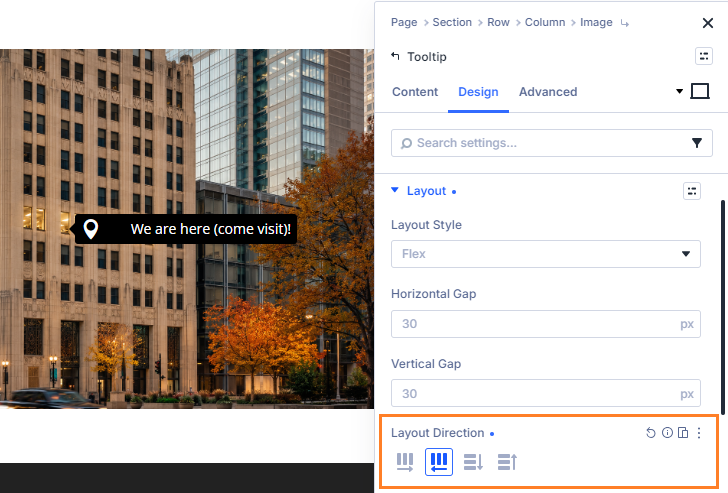
Adjust the Icon Position
Now, return to the Tooltip module's settings, where we'll adjust the position of the icon. By default the icon will be added below the tooltip content. You can change this by using the Flex Layout Direction setting in the Tooltip module's settings, at:
Tooltip > Design > Layout > Layout Direction
In this case, we'll use the "Row Reverse" layout direction to place the elements side-by-side and in reverse order, so that the icon appears first, then the tooltip text beside it.
Adjust the Icon Spacing
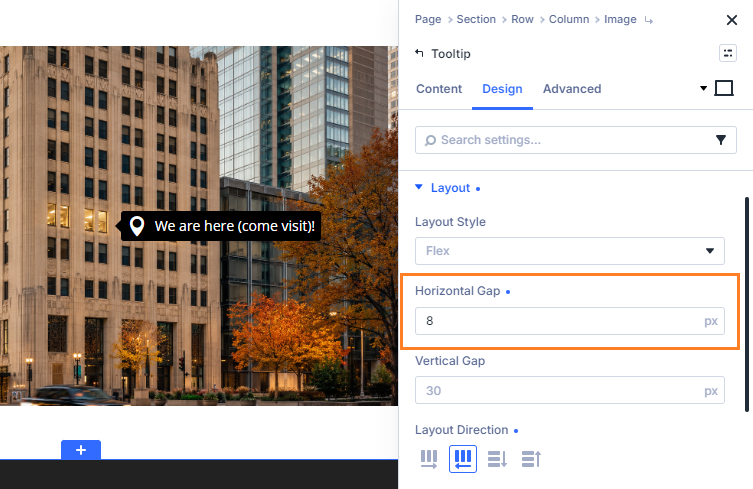
How, the icon is lined up beside the text, but there is a rather large gap between them. This is coming from the default 30px horizontal gap set in the tooltip's flex settings. We can adjust that at:
Tooltip > Design > Layout > Horizontal Gap
I've reduced that down to 8px in my example.
Fix the Tooltip Positioning
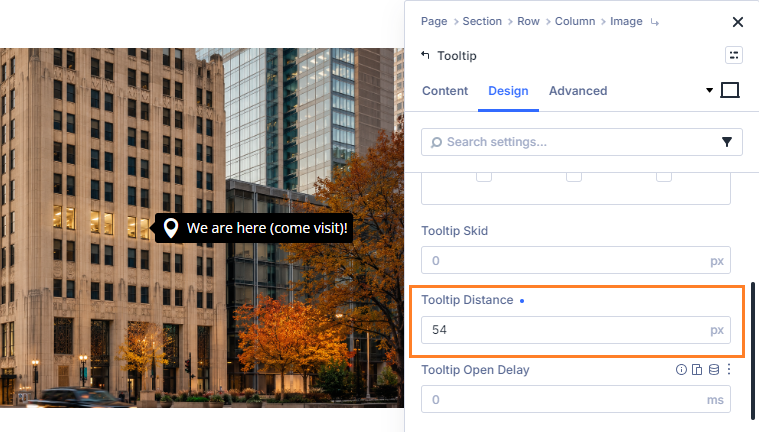
We're almost done, but there's one minor issue we need to fix up. You might notice that the addition of the icon has made the tooltip longer and changed where on the image the arrow points. We can fix this up by adjusting the positioning originally set in:
Tooltip > Design > Tooltip > Tooltip Distance
Conclusion
There we have it. We've now seen how to add an icon to the Divi Tooltip module.
If there's anything in particular that you'd like to be able to do with the Divi Tooltip module next, let me know in the comments below!

0 Comments