Slide-in Call-to-Action (CTA) elements are a good way to grab your users' attention and boost conversions. Here's an easy way to add a slide-in section to Divi. It slides-in an entire Divi Builder section into the bottom-right of the window as the user scrolls down. This means you're not limited to the CTA module – you can put whatever you want in there.
Scroll down the page for an example of this in action (here I am just using a basic CTA module).
The process is quite simple, but there are a couple of steps.
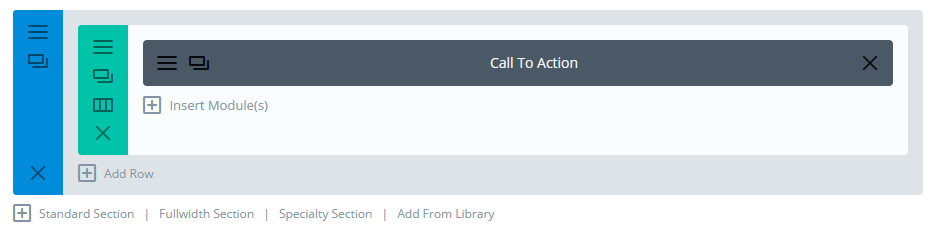
Step 1: Set up your Section
Now go into the newly added section and in the Advanced / Custom CSS tab, add the following as the CSS ID: slide-in-cta
Next add the rows and modules you want to this section. You may wish to begin customizing them, but note that we will adjust the width of the section later and so you may wish to hold off making too many changes until you can see what the final space available for content is.
Step 2: Add the Code Module
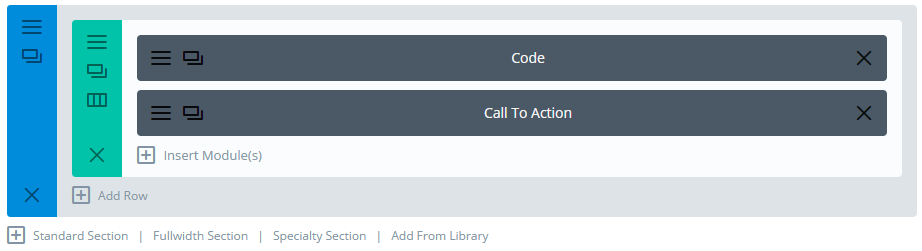
Add a code module as the very first module in your section's first row (I recommend making this row single-columned so that the close button added by the code module shows up in the right place).
Then in the code module's content field, paste the following:
<style>
#slide-in-cta {
   width: 33%;
   position: absolute;
   right: 0;
   z-index: 1;
}
.slide-in-cta-sticky {
	position: fixed !important;
	bottom: 0;
}
#slide-in-cta-close {
	float:right;
	line-height: 2em;
}
#slide-in-cta-close:before {
	content: "\4d";
	font-family: 'ETmodules';
	color: #fff;
    text-shadow: 1px 0 0 #999, 0 -1px 0 #999, 0 1px 0 #999, -1px 0 0 #999;
	font-size: 20pt;
}
#slide-in-cta .et_pb_code_0 {
	padding: 0;
	margin: 0;
}
</style>

<script>
jQuery(function($) {
	var waypoint = new Waypoint({
		element: $('#slide-in-cta + .et_pb_section'),
		handler: function(dir) {
			$('#slide-in-cta').toggleClass('slide-in-cta-sticky', (dir=='down'));
		},
		offset: function() {
			return $(window).height() - $('#slide-in-cta').outerHeight(true) + 10;
		}
	});
});
</script>

<a id="slide-in-cta-close" href="#" onclick="jQuery('#slide-in-cta').hide(); return false"></a>One thing you may need to change is the "width: 33%;" in the third row. This sets the total width of the section when it is displayed on the bottom right of the screen, inclusive of any padding, etc. Increase / decrease it for a wider / narrower slide-in section.
If you are having problems with the close button displaying incorrectly (as a bunch of icons), try replacing the content: "\\4d"; part with content: "\\\\4d";. It seems that on some Divi installations the double backslash is required (and gets converted into the correct single backslash).
Step 3: Customize the CTA Section
All that's left is to customize it to your needs. What you do with it is entirely up to you, of course, and you can customize it the way you would any other Divi section.
A couple of things to consider are:
- Do you want to remove all the section / row padding? This can be useful if you are displaying a single module. An alternative is to set a transparent background on the section.
- Do you want to disable it on mobiles? If so, you can disable it in the section settings.
One final note, the close button gets rid of the CTA section on this page view only. It will come back when the user refreshes the page. As such, you may want to add it to some pages, rather than having it on all your pages. I'll try look into adding a support for cookies to allow the CTA to be shown only once to each user.
Want get more out of Divi?

Hundreds of new features for Divi
in one easy-to-use plugin


This is so convenient. I thought that I would've needed to install Bloom or a similar plugin just for a slide-in. Thanks!
Glad it helped, Asad!
I figured out the problem I was having by checking out the source code for this blog post. Your supplied code above has an error. #slide-in-cta-close:before {
content: "\\4d"; has one backslash too many. It should be content: "\4d";
thanks for all the great work you do. Divibooster and your blog posts have helped me out tremendously with my client websites.
Thanks Mark. I'm glad you figured it out. The strange thing is that on some Divi installs the double backslash seems to be necessary and on others a single backslash is required. I haven't tracked down exactly why this is. The CSS is correct with a single backslash, but in some cases Divi seems to convert the double backslash into one (and gets rid of a single backslash entirely). I've updated the post to note this. Cheers!
Everything is working except for how "X" to close should be displayed. Instead of an "X" I'm seeing 3 symbols (a Target symbol [circle with a dot in the middle], A less than symbol and the symbol for a bullet list.)