
Divi's Dynamic Content feature is great for enhancing your post/page templates with post-specific information. While Divi includes an option to show information such as the Post Created Date using Dynamic Content, there is no equivalent option for the Post Status. This tutorial will show you how to make a Post Status option available in the dynamic content menu.
How to Add the Post Status in Divi's Dynamic Content using Divi Dynamic Content Extended
While Divi doesn't offer a Post Status option, you can easily add it using our Divi Dynamic Content Extended plugin. Let's look how to do it.
Get Divi Dynamic Content Extended
You'll need a copy of the Divi Dynamic Content Extended plugin, which adds loads of new features to Divi's dynamic content feature, including the one we need here. So if you haven't already done so, grab your copy now.

Install and activate the plugin on your site as normal and you're ready to continue.
Open your Page for Editing in the Visual Builder
Browse to the page you want to apply the change to. Then, in the WordPress admin bar at the top of the page, click the "Enable Visual Builder" button to open the page for editing in the Divi Builder.

Open the Module Settings
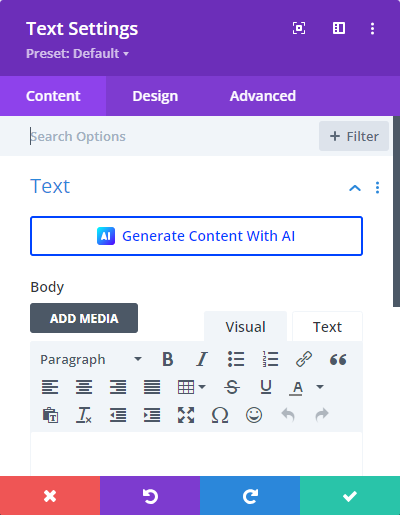
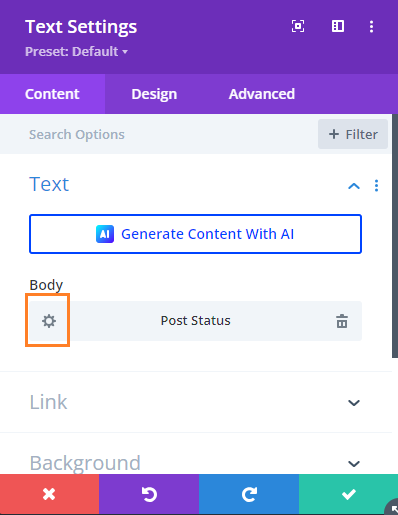
Next, open the settings for the module you wish to add the post status to. In this example, we'll add it to a text module. Locate the text module and click on the settings icon to open the module settings.
Click the Dynamic Content Icon Next to your Setting
Locate the setting you want to add the Post Status to, and hover over it to reveal the dynamic content icon. The dynamic content icon looks like a database symbol. Click on this icon to open the dynamic content menu.
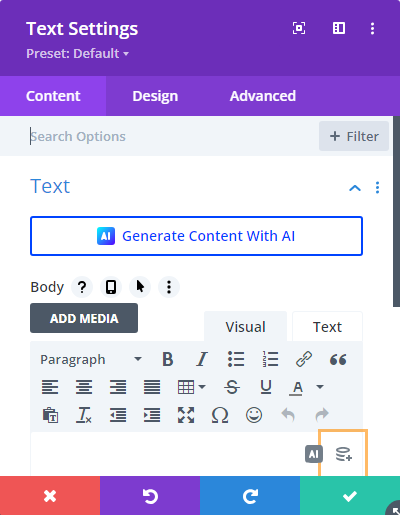
Now that the dynamic content icon is visible, click on it to open the dynamic content menu.
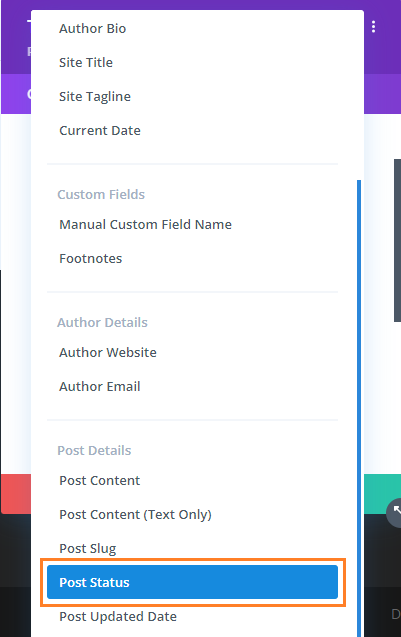
Select 'Post Status' in the Dynamic Content Menu
The dynamic content menu should now appear, with the Post Status available as one of the options. Scroll through the menu to find the "Post Status" option and click on it to select it.
See the Dynamic Content Preview
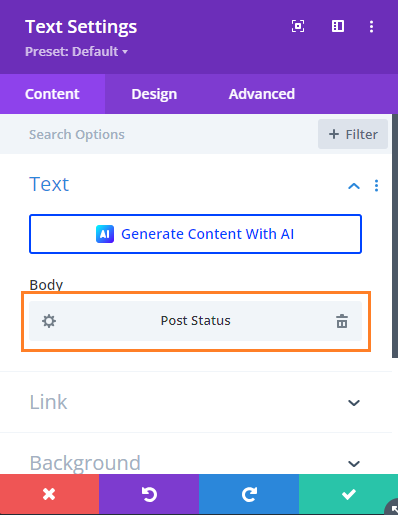
You should now see that your field has been set to take the value of the post's status.
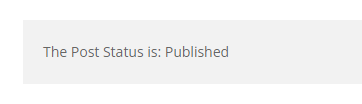
In the visual builder preview you should see that the text module now displays the status of the current post, e.g. "Draft" if this is a new post, "Published" if it is an existing post, etc.
Open the Dynamic Content Field Settings (Optional)
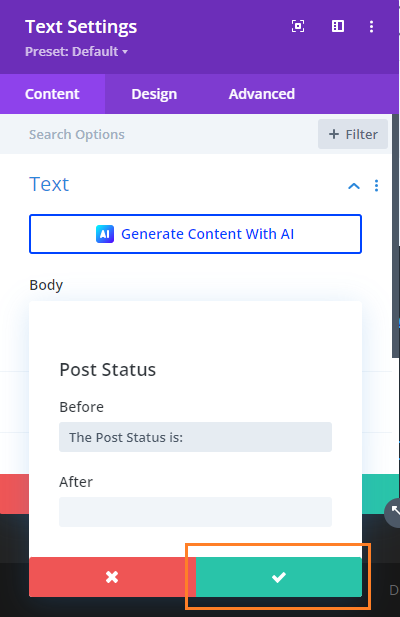
If you'd like to add text before or after the post status, you can do so by opening the dynamic content field's settings. Click on the settings icon next to the dynamic content field to open the settings.
Add Text Before the Status (Optional)
In the dynamic content settings, you can add text before or after the status. For example, you could add 'The Post Status is: ' before the status. Enter the text you want to add in the appropriate field.

Save the Dynamic Content Settings
Once you've added any text you want to include, save the dynamic content settings by clicking the save button.
Save the Module Settings
To save the changes to the module, click the green check mark button at the bottom of the module settings.

Save the Page
When you are ready, save the whole page by opening the Page Settings toolbar, by clicking on the round purple "three-dots" button at the bottom of the visual builder are, and clicking on the "Save" button.

View the Result
Now view your page on the front-end to see the changes. You should now see the post's status dynamically displayed in the module.
Conclusion
You have now successfully added the Post Status to your Divi module using Divi Dynamic Content Extended. If you have any questions or need further assistance, please feel free to ask.


0 Comments