Create a QR vCard with Divi QR Code Module

Written by Dan Mossop

You can create a vCard with contact information embedded in a QR code using the Divi QR Code Module. Here's a simple guide to help you set it up:

1. Prepare your vCard data: Make sure you have all the necessary contact information you'd like to include, formatted in the vCard standard. Here's an example of how the data might look:

BEGIN:VCARD
VERSION:3.0
N:Smith;John;;
FN:John Smith
ORG:Company Name
TITLE:Job Title
TEL;TYPE=WORK,VOICE:(111) 555-1212
EMAIL:john.smith@example.com
END:VCARD

2. Open Divi Builder: Go to the page where you want to add the QR code and enable the Divi Builder.

3. Add the QR Code Module: Insert the Divi QR Code Module into your layout.

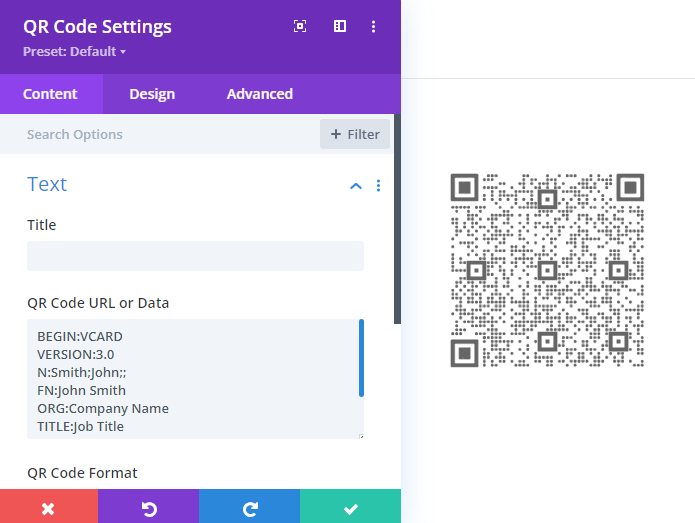
4. Enter vCard data: In the module settings, paste your vCard data into the "QR Code URL or Data" field.

5. Style your QR code: Use the module’s styling options to customize the appearance of your QR code so it matches your site design.

Save and Publish: Once you're satisfied with the styling, save your changes and publish the page.

Now, when users scan the QR code, their device will recognize it as a vCard and prompt them to add the contact information to their address book. If you need any guidance, feel free to ask!

Simplify QR Code Integration on Your Divi Website

Effortlessly add customizable QR codes to your Divi pages with the Divi QR Code Module. Enhance user engagement and drive conversions by linking directly to offers, apps, or web pages. Match your site's design easily and connect with your audience like never before.

About Dan Mossop

Dan is a Scottish-born web developer, now living in Brisbane with his wife and son. He has been sharing tips and helping users with Divi since 2014. He created Divi Booster, the first Divi plugin, and continues to develop it along with 20+ other Divi plugins. Dan has a PhD in Computer Science, a background in web security and likes a lot of stuff, 

0 Comments

Submit a Comment

Comments are manually moderated and approved at the time they are answered. A preview is shown while pending but may disappear if your are cookies cleared - don't worry though, the comment is still in the queue.

Your email address will not be published. Required fields are marked *.

We may earn a commission when you visit links on our website.

Latest Posts

Fade a Divi Image Module Edge into the Background

Want to create a stylish fade effect on your Divi image module—where one side fades smoothly into the background? With a bit of CSS, you can make any edge (or corner) of the image fade out: top, bottom, left, right, or even diagonally.Fade a Divi Image Module Edge...

Hide the Header and Footer in the Hello Elementor Theme

Removing the default header and footer from your Hello Elementor theme allows for a streamlined and distraction-free website design. This is especially useful when creating unique landing pages, full-width layouts, or custom headers and footers with a page builder. In...

Setting up the Divi Password Box Module

Setting up password protection on a page can help you control access to sensitive or private content in WordPress, allowing only authorized visitors to view certain sections. With the Divi Password Box module, you can replace the plain Divi password form with a fully...

Open Divi Social Media Icons in a New Tab

Ensuring your website's social media icons open in a new browser tab creates a seamless user experience and keeps visitors engaged with your site while allowing them to explore your social media presence. This approach prevents users from navigating away from your...

Set Hover Color for Menu Links in the Divi Menu Module

Customizing the hover color of menu links lets you enhance the user experience and maintain visual consistency with your website’s brand. By setting a specific hover color, you can guide visitors' attention and improve navigation feedback. In this guide we show you...

Random Posts