
Setting up password protection on a page can help you control access to sensitive or private content in WordPress, allowing only authorized visitors to view certain sections. With the Divi Password Box module, you can replace the plain Divi password form with a fully configurable module. In this guide we show you how to configure and verify the Divi Password Box setup to ensure your content is reliably secured and displayed as intended.
Setting Up Divi Password Box Module
This method demonstrates how to configure the Divi Password Box module on a new WordPress page, including setting custom titles, prompts, and display options for protected content. It walks you through both setup and verification steps, ensuring your protected content appears only after successful password entry, while also confirming error handling for incorrect password attempts.
Secure Your Page with WordPress Password Protection
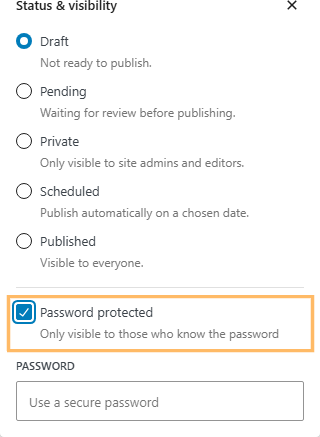
Before you add the Divi Password Box, you'll need to protect your page with WordPress's built-in password option. In the page editor, locate the visibility settings in the right sidebar and set the page to "Password protected." Enter a password of your choice so only users with this password can view the page.
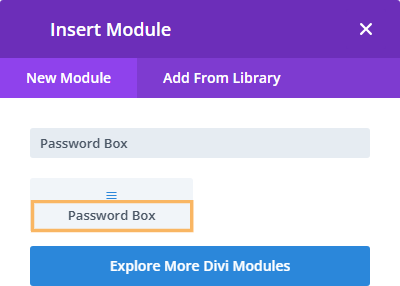
Launch Divi Builder and Insert the Password Box Module
Once your page is secured, switch to the Divi Builder by clicking "Use Divi Builder." Add a new section for the password form and then insert a new single-column row. In the module list, search for "Password Box" and add it to your row.
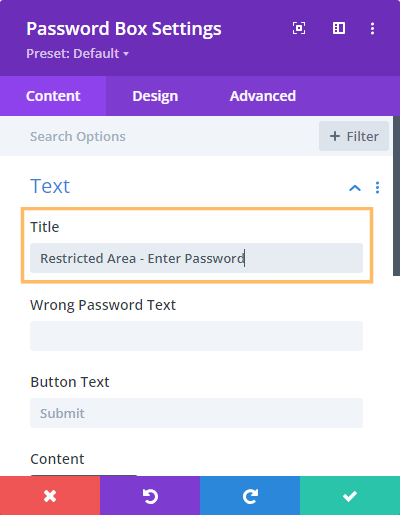
Customize the Password Box Module Content
With the Password Box Settings panel open, start customizing the module to match your needs:
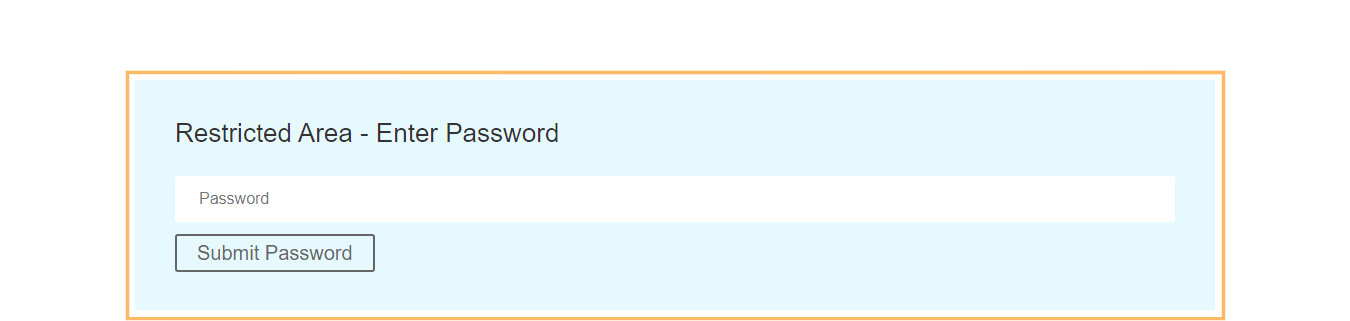
- Enter a clear title for your protected area (e.g., "Restricted Area – Enter Password").
- Add a helpful message for wrong passwords, like "Sorry, that password is incorrect."
- Set the button text, such as "Submit Password."
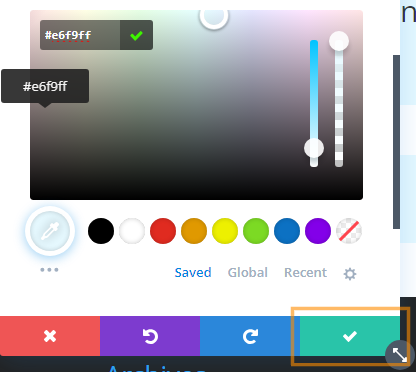
- Set custom styles, such as a background color.
Save Password Box Module Settings
Once your content and design settings are complete, click the green checkmark at the bottom of the settings panel to save your changes.
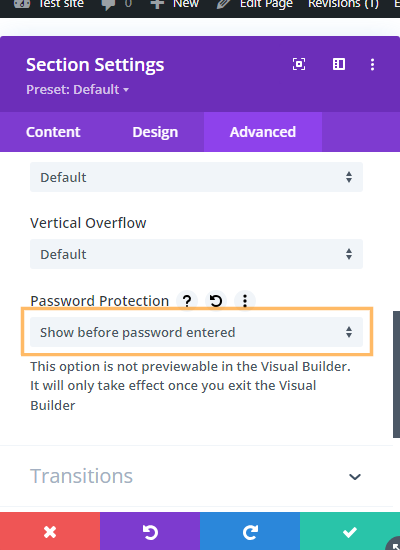
Configure Section Visibility
To replace the default Divi password form with the section containing your password box, adjust your section's visibility settings as follows. Open the blue section settings, go to the "Advanced" tab, and expand the "Visibility" section. Set "Password Protection" to "Show before password entered."
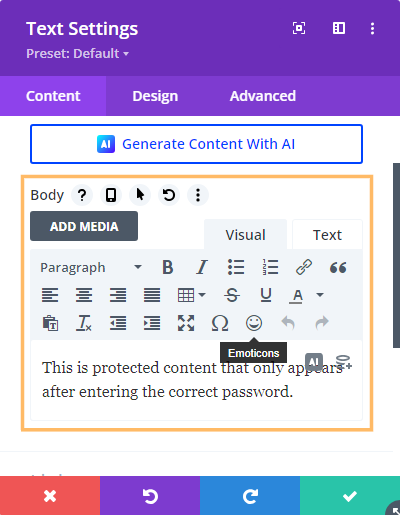
Add Protected Content to be Shown After Password Entry
Now, add regular sections with the content you want to show after the password is entered. For example, a section with a text module containing the protected content.
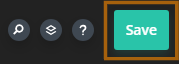
Save and Exit the Divi Builder
After configuring your sections, save your layout in the Divi Builder by clicking the green "Save" button on the bottom control bar. Then, exit the Visual Builder to view your page as a visitor would see it.
Test Your Password Protection
Navigate to your newly protected page. You should see the password prompt you created, and your protected content will not be visible yet. Try entering an incorrect password to make sure your error message appears. Next, enter the correct password to confirm you gain access to the protected content.
Conclusion
With these steps, you can easily create a custom password-protected area in Divi, providing both security and a personalized experience for your visitors.

0 Comments